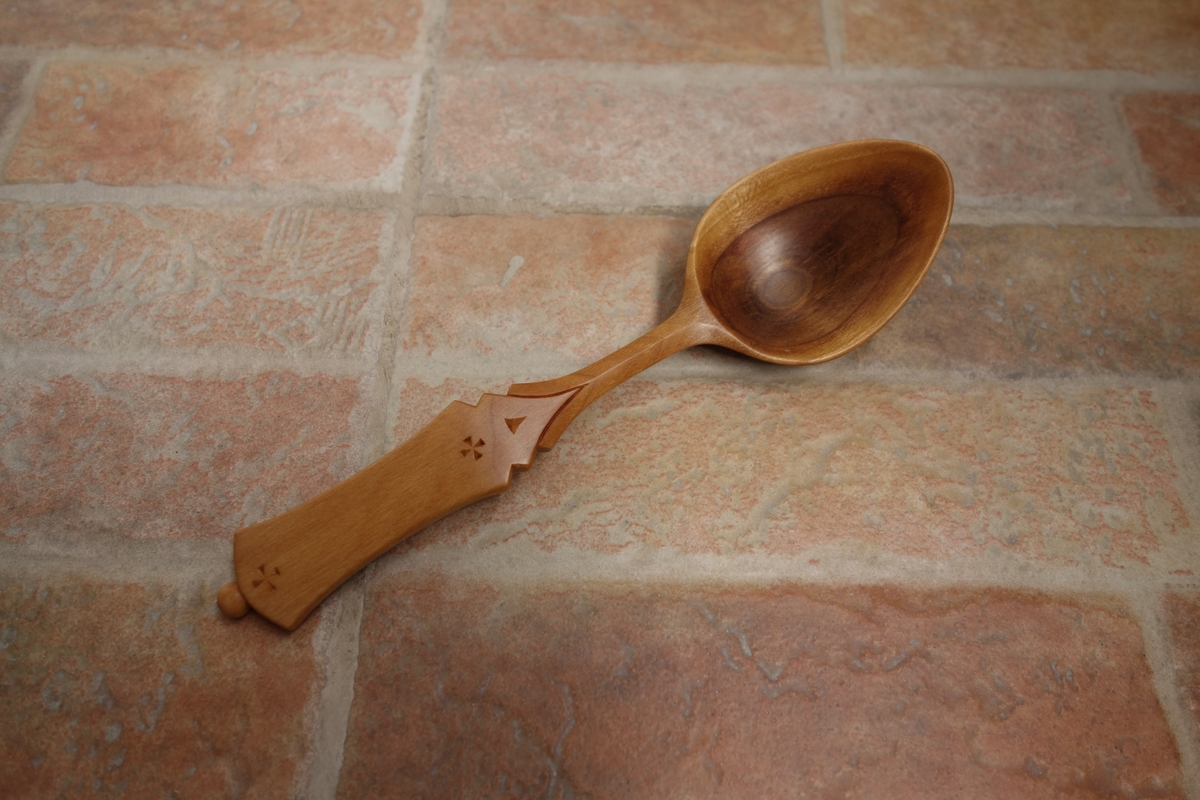
30 May 2021

FAQs about Sanding

1) Will I have splinters stuck in my tongue if I use a wooden spoon?

When I say "wood", many people imagine rough sawn planks bristling with splinters:


However, the surface depends on the used tools. A saw leaves such splinters because every tooth cuts and tears the wood fibers. But spoons are not carved with a saw! If you have suitable wood, a sharp knife and some skill, the surface of the spoon can be smoother than a smartphone display and there will be no splinters at all. The spoon can be additionally sanded and polished, but that's just for surface finishing, not for removing splinters. 

For example, these spoons are not sanded:


2) To sand or not to sand?

Nowadays it seems to be cool and trendy not to use any sandpaper. It kinda makes sense - if someone carves spoons for sale, he wants to make them as fast as possible and skip all the unnecessary steps. Proper sanding and polishing takes hours and if you skip it, you may save as much as one third of crafting time. And of course such craftsman will tell the customers that this is the best way to carve spoons. Besides, many people consider it an ultimate proof of skills if you can carve spoons that don't need to be sanded.

Sanding has a bad reputation because it is often used for hiding someone's carving mistakes. But let's face it - an ugly spoon will remain ugly no matter how much sandpaper you waste on it.

So if someone tries to convince you that sandpaper is ultimate evil, don't take that too seriously. It is just a matter of personal preference. Some people love faceted texture of knife cuts while others prefer uniform polished surface. I usually prefer sanded spoons because they are easier to wash. But I prefer unsanded spoons when:

  • the wood itself does not polish well (like cherry, basswood)
  • the wood is pale and without grain patterns (then the spoon is more interesting with faceted surface) 

3) What kind of sandpaper should I use?

Sandpaper is produced in various grit sizes, around 15-2000. The number indicates the amount of the abrasive material that can fit through a square inch filter, so larger number means that the grains are smaller and the grit is finer.

Some internet manuals will tell you that you must sand the spoon with grits 80, 120, 240, 360, 400, 600, 1000, 2000 and you can't skip any of them. But that rule is not universal. It depends on the wood and also on the quality of the sandpaper itself. 

For example, I seldom use grit 80 because it is too coarse for my taste and it leaves deep, ugly scratches. If the wood is quite soft (like willow), then I skip the 120 as well. I don't use my 240 grit sandpaper because it wears out very quickly (but maybe I just happened to buy some low-quality brand). I also skip 400 because it is too similar to 360, so the effort does not pay off. So I sand harder woods with 120, 360, 600 and then polish with 2000. For softer woods I use only 360, 600 and 2000. I recommend buying more different grits and brands in the beginning and to test what works best for you.


4) How to do it right?

I'm sure there are many good ways but this is what works for me.

Cut a strip 6-8cm wide (use some old scissors because the blades will get scratched by the coarser grits). Then fold the strip into a flat roll 6-8cm long and 1-2cm wide. This can be used to sand the outer walls. The folded paper is tough, it does not crumple under the fingers, but it is flexible enough to adjust to the spoon curves. When the outer layer wears out, you can cut it off and reveal the next layer.


When you move on to the next grit, make sure to remove any scratches that remained from the previous grit. When it's hard to tell if the scratches are old or new, you can just change the direction of the sanding.

After grit 600 the spoon will look and feel smooth but you are not there yet. Wash the spoon and let it dry. The fibers torn by the sandpaper will rise, the spoon will feel hairy and it must be re-sanded with grit 600. This step must be repeated until the spoon is smooth enough even after washing. The number of iterations depends on the wood. For example, lilac and hornbeam are smooth after two iterations while cherry is not good enough even after 10 of them (that's why I recommend not to sand cherry, it's just too much trouble).

Finally polish the spoon with grit 2000 and it can be finished with oil.


5) But how do I sand the inside of the bowl?

Cut a strip of sandpaper as wide as your index finger. You can fix it to your finger with tape or just hold it in place with other fingers. Then you can sand with your fingertip. You may have to use coarser grit in the beginning because sanding the inside is a little harder. The sandpaper strips also wear out quite quickly this way because they crumple a lot.


6) How can I tell if the spoon is sanded well?

Sanding might seem easy, but it also needs some practice. There are several common mistakes:

- visible scratches on the finished spoon (someone was lazy to remove them :D)  

 
- matt patches on the finished surface (these should have been straightened out with the coarsest sandpaper)


- sporadic grooves inside the bowl (those are some unfortunate cuts with a spoon knife, they are almost impossible to sand off)


6 March 2021

Spoon from a Walnut Branch

I've been a bit lazy to carve lately, I only made this spoon from a walnut branch. It is not sanded, just polished with a pebble.

If you want to know how to do it: first you must find a perfectly smooth stone because every tiny crack would leave scratches on the wood. Then simply polish the surface of the spoon. It will soften the edges and the traces of your knife cuts. But the cuts will be still visible to some extent, so the spoon must be carved nicely enough in the first place :)

14 February 2021

New Wood for my Collection: Pear

I have a new spoon from pear wood. It is similar to apple wood, it's very hard and can be polished nicely.

And this is a pebble from exotic wood known as "angelim pedra". It has very nice patterns and it smells like something between beans and dried fruits :)

3 December 2020

Cooking Spoons

When I have a piece of wood large enough for a cooking spoon, I usually use the opportunity. Cooking spoons and spatulas are easier to carve than eating spoons, especially with help of a drawknife and spokeshave.

And so I started to hoard them up in my cupboard. I keep on reassuring myself that that they have stopped multiplying now because I've already spent all the long pieces of wood... but who knows?


2 December 2020

Hornbeam Burl Cup

Burl wood often has interesting grain patterns. If you happen to find a suitable-sized burl somewhere, it's worth the effort to carve something from it.

This horbeam burl was quite big, so I had to saw some parts off. This is my improvised forest-style holdfast.

A cup is basically just empty space wrapped in wood, so I was in for lots of hollowing :) The best method was to drill a few holes and remove the leftover wood with a gouge. The holes shouldn't be too deep, it's better to drill gradually because:

  1. the drill can easily divert slightly to the side but it won't cause much damage if the hole is shallow
  2. the drill can be completely stuck in a deep hole if the wood is hard enough

I hollowed the inside with this bent gouge and then I smoothed the bottom with a spoon knife. The pencil arrows show areas with interlocked grain where I had to cut very carefully to avoid tearout.

I left the handle thick and coarse for a long time because I often cut into it accidentally while carving the outer walls. I only drilled a small provisional hole there so that the cup would be easier to hold. The picture below shows the handle after it was carved partially. It also shows how I began to smooth the outer walls with a spokeshave. The left side is shaved while the right side is roughly carved with a knife.

And this is my spokeshave. It can efficiently smooth flat or convex surfaces just like the outer walls of the cup. I also have a miniature spokeshave. I thought it would be good for spoons but it turned out that spoons don't really have so many convex surfaces. So the miniature spokeshave have been waiting for its great moment until now: the normal-sized spokeshave could not cut very well around the handle of the cup but the miniature one did the job just fine.

Here is the cup with finished outer walls and handle. And below are some more pictures of the cup sanded and polished.


15 September 2020

The End of a Plum Tree

It's time to spend some old stock of carving wood and so I returned to plumwood. It's the same wood I used when I began carving seven years ago. It was nice work, although a little nostalgic. 

The wood comes from a tree that was infected with plum pox virus and had to be cut down (now I feel an urge to say that plum pox does not spread to humans :)) The tree was still quite young, so the trunk did not have much brown heartwood in it.

This piece was suitable for a spoon:

This for a cooking spoon:

The last piece was also meant for a cooking spoon but it split completely askew. Normally I would throw such piece away but it was the last one, so I took a pity on it and carved this tiny coffee spoon:

And that's all from my supplies of plumwood. I wish to bring back to memory all the things that can be carved from one sick tree (and also to show how I've improved my carving skills over time). So I attached here the old pictures of everything carved from this tree in 7 years.

My historic spoon, I still have it (but I don't boast about it anymore):

A spoon for a friend I met on a volunteer camp:


A spatula carved from a cracked piece of wood, I had to throw it away because of that:


A spoon for a colleague:


A pebble adopted by my little nieces, twins:

One of these spatulas is still used in my kitchen, the other one in my sister's:

A replacement pebble for me:

 
A spoon for a friend:

Lumberjack's spoon for my husband:

A spoon without an owner yet:


28 August 2020

New Wood for my Collection: Elderberry

There is a black locust forest nearby. Black locusts are jerks, they release some toxins into soil to hamper other plants. Only elderberry bushes are resistant and they grow there in abundance. That's where I got the material for this little spoon. Though I also found a 6-meter tall elder tree with a thick trunk, I didn't want to destroy it. I rather cut a branch off a normal-size bush.

Elderberry wood has about 1cm wide sponge-like pith. That's why it is traditionally used for carving whistles (the soft pith makes drilling much easier). The wood has some dark streaks near the pith but otherwise it is not very interesting.

I also finished these two new spoons from wild cherry.